Saturday, June 15, 2013

Kelly's version of Marissa's version of Mo's famous pancakes

I keep losing my recipe, so even though I've terribly neglected this blog, I have to post this today so I don't lose my recipe again. It's time to make more mix.  Even my husband who "doesn't like pancakes" likes these.

Kelly's version of Marisa's version of Mo's famous pancakes


Ingredients
For the Mix:
  • 1 cups whole wheat flour
  • 1 1/2 cups a.p. flour
  • 1 cups honey toasted wheat germ (regular toasted wheat germ can be substituted if you can't find the honey stuff)
  • 1/2 cup cornmeal
  • 1/3 c.  + 1 Tbs cane sugar
  • 1 tablespoons kosher salt
  • 1 1/2 tablespoons baking powder
For Pancakes:
  • 1 eggs
  • 1/3 cup of milk
  • 2 tsp. or melted butter
  • 2/3 cup pancake mix
Instructions
  1. Mix all "mix" ingredients together and store in an airtight jar or container in the fridge until ready for use (all those whole grains can go rancid quickly, but cold storage will extend their life).
  2. To make pancakes, whisk together eggs, milk and oil or melted butter. Mix in pancake mix. If it seems to thick, add a bit more milk.
  3. Heat a griddle to medium heat and oil it lightly.  The pancakes are ready to flip when the bubbles around the edges of the cakes pop and stay open.
  4. Cook just another minute or two on the other side.
  5. Serve with maple syrup (real only, please), jam and yogurt or honey.

Saturday, March 24, 2012

How to make your own breakfast sausage

Oh my gosh!! I just made the BEST breakfast sausage.  I've made Italian sausage before that turned out just fine, but this...this...breakfast sausage is seriously, the best I've ever tasted.  (My husband says I say that all the time, but this time it's true).
It doesn't hurt that I have the best or rather had the best source available for my pork...Fehringer Farms.  (I'm so sad in so many ways to have left them behind in Sidney as we recently moved to Arizona.)

Making your own sausage is really easy and the better the ingredients, the better the taste. The herbs I used were what I grew and dried myself. The pepper I used is an amazing pepper blend that I got from Ricky and Lucy's Greenhouse. It's their Smokey Spicy Pepper Blend and it was PERFECT in this recipe.  I started with Alton Brown's recipe for breakfast sausage and then used what I had.
Kelly's Breakfast Sausage Recipe
Ingredients:
1 lb. fresh ground pork
1 tsp. kosher salt
1 tsp. dried sage
1 tsp. dried thyme
1/2 tsp. Ricky and Lucy's Smoky Spicy Pepper Blend
pinch freshly grated nutmeg
1/2 TBSP. brown sugar

Add all ingredients to mixing bowl and blend on low for 1-2 minutes.  Form into patties and fry in a non-stick frying pan on medium heat.

Cook a test patty and taste, then adjust your seasonings as needed.  I didn't need to adjust mine at all from the above recipe. Some may prefer a little more salt.
Try it!  Your homemade sausage will not taste like Jimmy Dean if that's what you're looking for, but if you want a great tasting sausage without preservatives or fillers, then try it at home.  I think you'll love it.
Till later,
Kelly

Thursday, June 23, 2011

Welcome to my blog

Welcome to "How To Bake Bread...and other homemade goodies"! I'm so glad you stopped by!

Please take some time to look at my recipes, read about my bread making adventures, and review my recommendations on kitchen products and tools.  I also like to share my gardening experiences, and as a result, you'll find lots of recipes using fresh garden produce and herbs here!  I hope you enjoy what you find and that you'll leave me a comment.

Fine print:  The recipes you find here are copywrited material.  You may re-post only with a link back here to the original recipe.  You may publish in publications with permission only.  Thank you!
(This post will remain at the top of my blog until I've decided it's not needed at the top. Smile)

Wednesday, March 2, 2011

We started our seed Saturday night

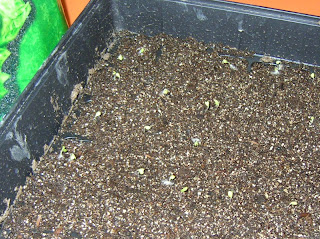
I’m so excited to start the garden I can hardly stand it!  Hopefully, by the end of the month we’ll be able to plant potatoes, onions and peas.  We will plant them as soon as the ground thaw and can be worked easily.  For the things we need to start indoors, we started our seed on Saturday night and got 72 pods planted.  On Sunday, we planted the other 72 pods.  We chose to use seed starting soil instead of those little pellets that expand in water.  We didn’t like the way they worked and just seemed to create garbage in our garden.  But we did re-use our Jiffy greenhouses from last year. I probably should have cleaned them out before I re-used them, huh?
Because we chose to do it THIS way we’ll probably have to transplant everything to at least 3” pots before they’ll be ready to go outside, because there isn’t very much soil in these little pods.  Here’s a picture I took as we were sowing the seeds on Saturday night and a picture that I took just about an hour ago.
I think the seed you see here are tomato seeds.

That’s cabbage coming up already!  It’s so exciting!  I’ll give you a complete list of our starter plants in a later post…I promise.  Check back later to watch the progress! Are you starting seed?
Till later,
Kelly


Tuesday, March 1, 2011

Cinnamon Oatmeal Bread-Success!

I've been having a little trouble lately with my bread making and really, baking in general.  I made some bran muffins this weekend that turned out completely flat.  I was super bummed and I have no idea what went wrong.  They puffed up then fell...oh well, if I ever figure out what went wrong, I'll let you know.


So yesterday, when I baked a successful loaf with a new recipe I was super EXCITED!  This bread is soooo delicious, not to mention the amazing cinnamon aroma that fills your house while it's baking! I don't like the way the jelly roll is kind of coming apart, but I'm going to try this recipe in a smaller pan and see if that fixes that problem.

This is another Bernard Clayton recipe which I altered slightly as I do everything these days.
Ingredients:
1 1/2 cups rolled oats
1 1/2 cups boiling water
3 Tablespoons brown sugar (his recipe calls for honey, but I was out)
1 Tablespoon molasses (his recipe calls for brown sugar, which I actually increased)
2 teaspoons kosher salt
1 mini box of raisins, I would guess about 1/4 cup (Bernard calls for 1/2 cup)
1 package rapid dry yeast
2 eggs, room temperature (put them in a bowl of hot tap water for a few minutes if they're fresh out of the fridge)
4 to 5 cups bread flour (I ended up using almost exactly 4 cups)
3 Tablespoons melted butter
1 cup granulated sugar
4 rounded teaspoons ground cinnamon (he called for 2 Tablespoons)

Directions:
Grease 2 medium (8x4") loaf pans.
In a large bowl, mix together the rolled oats and boiling water.  Stir to blend, add the butter, brown sugar, molasses, salt and raisins.  Let stand for a few moments to be certain the oats have absorbed the water. 
Let the mixture cool to no more than 130 degrees F.  (That's because the rapid yeast requires that high temperature to activate it) This cooling doesn't take more than a minute or two, so keep a close eye on the temp.  This is not the time to go off and drink some coffee.
Add the yeast, eggs and 2 cups flour.  With a wooden spoon stir vigorously for 2-3 minutes, or use your mixer (mine is broken...so sad).
Work in additional flour, 1/2 cup at a time, with the spoon first and then with your hands.  Once the dough starts holding together and cleaning the sides of the bowl, turn out onto a floured surface. (I added 1 1/2 cups of flour before I had to turn it out). Knead with a strong push-turn-fold rhythm. Add more flour if the dough is slack or sticky. Knead for 8 minutes.
Put the dough in a buttered bowl and cover tightly with plastic wrap.  Set the bowl of dough aside to rise until at least double in size, about 1 hour. I turn my oven on to the lowest temperature (for me thats 170) and as soon as the oven reaches that temperature I turn it off.  I let my dough rise in that warm oven.  It's too cold in my house to do otherwise in the winter.
Turn the dough out and divide into 2 equal pieces.  Roll out each piece into a rectangular shape about 8 x 12".  Spread half the melted butter over each piece.
In a separate bowl, mix 1/2 cup sugar and 2 rounded teaspoons of cinnamon.  Sprinkle over butter on one rolled piece.  Repeat this step with the second piece.
Roll each piece up jelly-roll fashion.  Place in prepared loaf pans seam side down.  Press dough into corners with fingertips.
Cover the pans loosely with wax paper and set aside to rise.  The center of the dough should be just above the edge of the pan. 
Bake loaves in a preheated 375 degree F. oven for about 40 minutes.  Remove when the crusts are nicely browned and the bottom sounds hollow when tapped.  Be careful when removing from the pans, the sugar that leaks out on the bottom will be HOT, and it will STICK to you.  Brush the tops with more melted butter and cool on a cooling rack.  Enjoy!  I know you will!
Thanks for stopping by, and if you have any ideas why my baked goods have been falling on me, I'd love to hear your theories!
Till later,
Kelly
P.S. I'm really glad I choose to reduce the cinnamon...mine was plenty cinnamon-y even with the reduction. Now is the time to go drink your coffee! Mmmm! Mmmm!

Saturday, February 19, 2011

10 Things I've learned about baking bread...

10 important things I’ve learned about baking bread…

  1. A good bread making book by an expert bread maker will make a huge difference in your skills, if you read it, that is.
  2. A Kitchen Aid is a God-send when you’re learning to knead.  If your recipe says to knead your bread for 10 minutes then you can turn your kitchen aid on to a medium low speed with the dough hook on and let it work its magic for 10 minutes.  Your bread will be kneaded satisfactorily.  Check for the “baker’s window”* to see if it’s done.  Allowing the Kitchen Aid to do the kneading for me, allowed me to understand what fully kneaded bread looked and felt like.
  3. When my Kitchen Aid stopped working, I became an even better bread maker.  If you want to make a better loaf, knead by hand.  I followed the kneading advice of an expert bread maker (from his book) and found that when I knead by hand, my bread has uneven holes which is what I prefer.
  4. Start with pizza dough. You’ll be wasting fewer ingredients if you mess it up.  And you can still use it even if it doesn’t rise properly.
  5. Perfect a loaf of white bread, then attempt wheat.  Using whole wheat can be a little tricky; you’ll feel better if you ease yourself into it.
  6. Once you can REALLY bake a good loaf of white bread, you can bake dinner rolls, which is just kind of fun.
  7. Don’t give up! You CAN learn how to make a good loaf of bread with a little practice.
  8. A pan of water in the bottom of your oven during baking creates a lovely crispy crust on French and Italian breads. Spritzing the bread and the oven is totally unnecessary.
  9. Always read the recipe thoroughly, all the way to the end, BEFORE beginning.
  10. Yeast is very sensitive. 
*A baker's window is a thin window pane of dough that is created when you stretch a small handful of dough.  If the window pane is created (you can almost see through it) before the dough breaks, then you have kneaded the dough long enough.
Baking bread is very rewarding.  If you want to learn how to bake bread, buy a book and start practicing. 
Thanks for stopping by today!
Kelly
This is the book I read and highly recommend!  See if your local library has it and read a bit and even try a recipe before you buy.  Then you'll know it's worth adding to your own library.

Wednesday, February 16, 2011

Spicy Ranch Beans with our own homegrown pinto beans!

Here's another recipe I developed using our homegrown pinto beans. (click to read more about our growing experience)  Watch out! These beans are spicy and addictive and unintentionally low-fat!  If you prefer a little less heat, just cut back on the jalapenos or eliminate all together, although, I wouldn't advice no heat because as the recipe states, this is a recipe for Spicy Ranch Beans.  Please enjoy and your feed back is appreciated!

Spicy Ranch Beans
Printable version
1 lb pinto beans that have been soaked and cooked in water and salt until tender. The yield from 1 lb of dry beans will be about 7-8 cups of cooked beans.  Make sure that there is at least 2 cups of cooking liquid in with the beans before proceeding with the recipe.
1 Tablespoon Cumin
1 Tablespoon Chili Powder
1 onion finely diced
2 garlic cloves finely minced
1 bay leaf
Salt to taste (if you cooked your dry beans with salt, you may not need to add more salt to the ranch beans)
Pepper to taste
1 teaspoon Better Than Bouillon beef base
1 Teaspoon liquid smoke
1 Tablespoon molasses
2 teaspoons Worcestershire sauce
2 Tablespoons canned diced jalapeƱos (use 1-2 fresh jalapenos depending on the heat factor you desire)

Combine all ingredients with 1 cup of water in a large deep pot and cook over low heat for at least 1 hour until onions are soft.  Remove bay leaf and serve.

This is fabulous stuff and a staple in my refrigerator at all times .  I keep all three on hand, chicken, vegetable and beef bases.  Try adding a little of the vegetable base to your next stir fry for a nice low-fat yet rich addition of flavor!

Thanks for stopping by!
Kelly