Saturday, June 15, 2013

Kelly's version of Marissa's version of Mo's famous pancakes

I keep losing my recipe, so even though I've terribly neglected this blog, I have to post this today so I don't lose my recipe again. It's time to make more mix.  Even my husband who "doesn't like pancakes" likes these.

Kelly's version of Marisa's version of Mo's famous pancakes


Ingredients
For the Mix:
  • 1 cups whole wheat flour
  • 1 1/2 cups a.p. flour
  • 1 cups honey toasted wheat germ (regular toasted wheat germ can be substituted if you can't find the honey stuff)
  • 1/2 cup cornmeal
  • 1/3 c.  + 1 Tbs cane sugar
  • 1 tablespoons kosher salt
  • 1 1/2 tablespoons baking powder
For Pancakes:
  • 1 eggs
  • 1/3 cup of milk
  • 2 tsp. or melted butter
  • 2/3 cup pancake mix
Instructions
  1. Mix all "mix" ingredients together and store in an airtight jar or container in the fridge until ready for use (all those whole grains can go rancid quickly, but cold storage will extend their life).
  2. To make pancakes, whisk together eggs, milk and oil or melted butter. Mix in pancake mix. If it seems to thick, add a bit more milk.
  3. Heat a griddle to medium heat and oil it lightly.  The pancakes are ready to flip when the bubbles around the edges of the cakes pop and stay open.
  4. Cook just another minute or two on the other side.
  5. Serve with maple syrup (real only, please), jam and yogurt or honey.

Saturday, March 24, 2012

How to make your own breakfast sausage

Oh my gosh!! I just made the BEST breakfast sausage.  I've made Italian sausage before that turned out just fine, but this...this...breakfast sausage is seriously, the best I've ever tasted.  (My husband says I say that all the time, but this time it's true).
It doesn't hurt that I have the best or rather had the best source available for my pork...Fehringer Farms.  (I'm so sad in so many ways to have left them behind in Sidney as we recently moved to Arizona.)

Making your own sausage is really easy and the better the ingredients, the better the taste. The herbs I used were what I grew and dried myself. The pepper I used is an amazing pepper blend that I got from Ricky and Lucy's Greenhouse. It's their Smokey Spicy Pepper Blend and it was PERFECT in this recipe.  I started with Alton Brown's recipe for breakfast sausage and then used what I had.
Kelly's Breakfast Sausage Recipe
Ingredients:
1 lb. fresh ground pork
1 tsp. kosher salt
1 tsp. dried sage
1 tsp. dried thyme
1/2 tsp. Ricky and Lucy's Smoky Spicy Pepper Blend
pinch freshly grated nutmeg
1/2 TBSP. brown sugar

Add all ingredients to mixing bowl and blend on low for 1-2 minutes.  Form into patties and fry in a non-stick frying pan on medium heat.

Cook a test patty and taste, then adjust your seasonings as needed.  I didn't need to adjust mine at all from the above recipe. Some may prefer a little more salt.
Try it!  Your homemade sausage will not taste like Jimmy Dean if that's what you're looking for, but if you want a great tasting sausage without preservatives or fillers, then try it at home.  I think you'll love it.
Till later,
Kelly

Thursday, June 23, 2011

Welcome to my blog

Welcome to "How To Bake Bread...and other homemade goodies"! I'm so glad you stopped by!

Please take some time to look at my recipes, read about my bread making adventures, and review my recommendations on kitchen products and tools.  I also like to share my gardening experiences, and as a result, you'll find lots of recipes using fresh garden produce and herbs here!  I hope you enjoy what you find and that you'll leave me a comment.

Fine print:  The recipes you find here are copywrited material.  You may re-post only with a link back here to the original recipe.  You may publish in publications with permission only.  Thank you!
(This post will remain at the top of my blog until I've decided it's not needed at the top. Smile)

Wednesday, March 2, 2011

We started our seed Saturday night

I’m so excited to start the garden I can hardly stand it!  Hopefully, by the end of the month we’ll be able to plant potatoes, onions and peas.  We will plant them as soon as the ground thaw and can be worked easily.  For the things we need to start indoors, we started our seed on Saturday night and got 72 pods planted.  On Sunday, we planted the other 72 pods.  We chose to use seed starting soil instead of those little pellets that expand in water.  We didn’t like the way they worked and just seemed to create garbage in our garden.  But we did re-use our Jiffy greenhouses from last year. I probably should have cleaned them out before I re-used them, huh?
Because we chose to do it THIS way we’ll probably have to transplant everything to at least 3” pots before they’ll be ready to go outside, because there isn’t very much soil in these little pods.  Here’s a picture I took as we were sowing the seeds on Saturday night and a picture that I took just about an hour ago.
I think the seed you see here are tomato seeds.

That’s cabbage coming up already!  It’s so exciting!  I’ll give you a complete list of our starter plants in a later post…I promise.  Check back later to watch the progress! Are you starting seed?
Till later,
Kelly


Tuesday, March 1, 2011

Cinnamon Oatmeal Bread-Success!

I've been having a little trouble lately with my bread making and really, baking in general.  I made some bran muffins this weekend that turned out completely flat.  I was super bummed and I have no idea what went wrong.  They puffed up then fell...oh well, if I ever figure out what went wrong, I'll let you know.


So yesterday, when I baked a successful loaf with a new recipe I was super EXCITED!  This bread is soooo delicious, not to mention the amazing cinnamon aroma that fills your house while it's baking! I don't like the way the jelly roll is kind of coming apart, but I'm going to try this recipe in a smaller pan and see if that fixes that problem.

This is another Bernard Clayton recipe which I altered slightly as I do everything these days.
Ingredients:
1 1/2 cups rolled oats
1 1/2 cups boiling water
3 Tablespoons brown sugar (his recipe calls for honey, but I was out)
1 Tablespoon molasses (his recipe calls for brown sugar, which I actually increased)
2 teaspoons kosher salt
1 mini box of raisins, I would guess about 1/4 cup (Bernard calls for 1/2 cup)
1 package rapid dry yeast
2 eggs, room temperature (put them in a bowl of hot tap water for a few minutes if they're fresh out of the fridge)
4 to 5 cups bread flour (I ended up using almost exactly 4 cups)
3 Tablespoons melted butter
1 cup granulated sugar
4 rounded teaspoons ground cinnamon (he called for 2 Tablespoons)

Directions:
Grease 2 medium (8x4") loaf pans.
In a large bowl, mix together the rolled oats and boiling water.  Stir to blend, add the butter, brown sugar, molasses, salt and raisins.  Let stand for a few moments to be certain the oats have absorbed the water. 
Let the mixture cool to no more than 130 degrees F.  (That's because the rapid yeast requires that high temperature to activate it) This cooling doesn't take more than a minute or two, so keep a close eye on the temp.  This is not the time to go off and drink some coffee.
Add the yeast, eggs and 2 cups flour.  With a wooden spoon stir vigorously for 2-3 minutes, or use your mixer (mine is broken...so sad).
Work in additional flour, 1/2 cup at a time, with the spoon first and then with your hands.  Once the dough starts holding together and cleaning the sides of the bowl, turn out onto a floured surface. (I added 1 1/2 cups of flour before I had to turn it out). Knead with a strong push-turn-fold rhythm. Add more flour if the dough is slack or sticky. Knead for 8 minutes.
Put the dough in a buttered bowl and cover tightly with plastic wrap.  Set the bowl of dough aside to rise until at least double in size, about 1 hour. I turn my oven on to the lowest temperature (for me thats 170) and as soon as the oven reaches that temperature I turn it off.  I let my dough rise in that warm oven.  It's too cold in my house to do otherwise in the winter.
Turn the dough out and divide into 2 equal pieces.  Roll out each piece into a rectangular shape about 8 x 12".  Spread half the melted butter over each piece.
In a separate bowl, mix 1/2 cup sugar and 2 rounded teaspoons of cinnamon.  Sprinkle over butter on one rolled piece.  Repeat this step with the second piece.
Roll each piece up jelly-roll fashion.  Place in prepared loaf pans seam side down.  Press dough into corners with fingertips.
Cover the pans loosely with wax paper and set aside to rise.  The center of the dough should be just above the edge of the pan. 
Bake loaves in a preheated 375 degree F. oven for about 40 minutes.  Remove when the crusts are nicely browned and the bottom sounds hollow when tapped.  Be careful when removing from the pans, the sugar that leaks out on the bottom will be HOT, and it will STICK to you.  Brush the tops with more melted butter and cool on a cooling rack.  Enjoy!  I know you will!
Thanks for stopping by, and if you have any ideas why my baked goods have been falling on me, I'd love to hear your theories!
Till later,
Kelly
P.S. I'm really glad I choose to reduce the cinnamon...mine was plenty cinnamon-y even with the reduction. Now is the time to go drink your coffee! Mmmm! Mmmm!

Saturday, February 19, 2011

10 Things I've learned about baking bread...

10 important things I’ve learned about baking bread…

  1. A good bread making book by an expert bread maker will make a huge difference in your skills, if you read it, that is.
  2. A Kitchen Aid is a God-send when you’re learning to knead.  If your recipe says to knead your bread for 10 minutes then you can turn your kitchen aid on to a medium low speed with the dough hook on and let it work its magic for 10 minutes.  Your bread will be kneaded satisfactorily.  Check for the “baker’s window”* to see if it’s done.  Allowing the Kitchen Aid to do the kneading for me, allowed me to understand what fully kneaded bread looked and felt like.
  3. When my Kitchen Aid stopped working, I became an even better bread maker.  If you want to make a better loaf, knead by hand.  I followed the kneading advice of an expert bread maker (from his book) and found that when I knead by hand, my bread has uneven holes which is what I prefer.
  4. Start with pizza dough. You’ll be wasting fewer ingredients if you mess it up.  And you can still use it even if it doesn’t rise properly.
  5. Perfect a loaf of white bread, then attempt wheat.  Using whole wheat can be a little tricky; you’ll feel better if you ease yourself into it.
  6. Once you can REALLY bake a good loaf of white bread, you can bake dinner rolls, which is just kind of fun.
  7. Don’t give up! You CAN learn how to make a good loaf of bread with a little practice.
  8. A pan of water in the bottom of your oven during baking creates a lovely crispy crust on French and Italian breads. Spritzing the bread and the oven is totally unnecessary.
  9. Always read the recipe thoroughly, all the way to the end, BEFORE beginning.
  10. Yeast is very sensitive. 
*A baker's window is a thin window pane of dough that is created when you stretch a small handful of dough.  If the window pane is created (you can almost see through it) before the dough breaks, then you have kneaded the dough long enough.
Baking bread is very rewarding.  If you want to learn how to bake bread, buy a book and start practicing. 
Thanks for stopping by today!
Kelly
This is the book I read and highly recommend!  See if your local library has it and read a bit and even try a recipe before you buy.  Then you'll know it's worth adding to your own library.

Wednesday, February 16, 2011

Spicy Ranch Beans with our own homegrown pinto beans!

Here's another recipe I developed using our homegrown pinto beans. (click to read more about our growing experience)  Watch out! These beans are spicy and addictive and unintentionally low-fat!  If you prefer a little less heat, just cut back on the jalapenos or eliminate all together, although, I wouldn't advice no heat because as the recipe states, this is a recipe for Spicy Ranch Beans.  Please enjoy and your feed back is appreciated!

Spicy Ranch Beans
Printable version
1 lb pinto beans that have been soaked and cooked in water and salt until tender. The yield from 1 lb of dry beans will be about 7-8 cups of cooked beans.  Make sure that there is at least 2 cups of cooking liquid in with the beans before proceeding with the recipe.
1 Tablespoon Cumin
1 Tablespoon Chili Powder
1 onion finely diced
2 garlic cloves finely minced
1 bay leaf
Salt to taste (if you cooked your dry beans with salt, you may not need to add more salt to the ranch beans)
Pepper to taste
1 teaspoon Better Than Bouillon beef base
1 Teaspoon liquid smoke
1 Tablespoon molasses
2 teaspoons Worcestershire sauce
2 Tablespoons canned diced jalapeños (use 1-2 fresh jalapenos depending on the heat factor you desire)

Combine all ingredients with 1 cup of water in a large deep pot and cook over low heat for at least 1 hour until onions are soft.  Remove bay leaf and serve.

This is fabulous stuff and a staple in my refrigerator at all times .  I keep all three on hand, chicken, vegetable and beef bases.  Try adding a little of the vegetable base to your next stir fry for a nice low-fat yet rich addition of flavor!

Thanks for stopping by!
Kelly

Tuesday, February 15, 2011

Strawberrry Comfort Martini

I was making strawberry cupcakes on Saturday and was using frozen strawberries in the mix which inspired me to create this drink recipe which turned out to be better than my cupcakes!  I'm calling it the Strawberry Comfort Martini.

Strawberry Comfort Martini
Serves 2
In a blender combine:
1/2 cup semi-frozen sliced strawberries with sugar
3/4 ounce amaretto (I made my own!)
1 1/2 ounces Southern Comfort
1 cup ice
Blend until smooth.
Pour into two chilled martini glasses and top with 7-Up or gingerale. Stir and enjoy.

I imagine these will be enjoyed more this summer than in the dead of winter, but if you want to do a little summer dreaming, this strawberry comfort martini should  help!
AND it's PINK!!!

Need a stunning martini glass?  Try these Luigi Bormioli's!  Or search for others on Amazon...

Wednesday, January 12, 2011

The BEST Slow Cooker Spaghetti Sauce

The BEST Crock pot Spaghetti Sauce!
I made this spaghetti sauce yesterday and right after the first bite Shawn asked me if I had written it down yet.  He's such a good husband! (It couldn't just be that he wants to make sure he gets to eat this again, could it?)  I appreciate his praise and his reminders!
This spaghetti sauce turned out spicy and as Shawn described it, the perfect blend between sweet, spicy and Italian flavorings.  It's rich and thick and SOOO easy to make!  I used to doctor up Prego, but now I'm sticking with this recipe! (At least when I can remember to put it in the crock pot first thing in the morning.)
I was able to use our own onions, garlic, and green pepper in this recipe.  I never got around to drying any of our basil this year.  The green pepper was diced and frozen in vacuum packed bags.  The garlic, I keep in a paper bag in my pantry.  The onions are kept in a box in grandma's basement where it's cool, but not cold.


The BEST Slow Cooker Spaghetti Sauce

Ingredients:
1 lb. package of Jimmy Dean Italian Sausage
1 green pepper, chopped
1 (preferably sweet) onion, chopped
6 cloves garlic
2 cans Italian style stewed tomatoes (I think Italian style diced tomatoes would work as well)
1 can crushed tomatoes (28 oz)
1 can  tomato paste (6 oz.)
3 tablespoons sugar
4 teaspoons Italian Seasoning (I recommend Ricky and Lucy's Italian Seasoning Blend, everything is grown just a few miles away from here, fresh, organic, hand picked...awesome!)
2 teaspoons dried basil (Again, use Ricky and Lucy's Basil Blend)
1 teaspoon kosher salt (If you don't use large grained kosher salt, start!  But if you insist on that iodized small grain stuff, you may need to reduce the salt to 1/2 - 3/4 tsp.)
1/2 teaspoon freshly ground pepper
When you are ready to serve, prepare some Hot Cooked Spaghetti (Ricky and Lucy's sells this too, but I've never tried it) (Don't buy cheap off brand spaghetti, the difference in taste is not worth it.  Costco sells a good one)

Directions:
In a large skillet (I prefer my iron skillet for browning meat) over medium high heat, brown the sausage.  Make sure you actually brown some of it, not just cook till no longer pink.  Carmelization=Flavor
Transfer to a 5 qt. slow cooker.  Stir in all of the remaining ingredients except the hot cooked spaghetti. Break up the stewed tomatoes into bite size pieces while stirring.
Cover and cook on high for about 6 hours.  The onions should be translucent when done.  Note:  The sauce will not taste as sweet when it's finished as when you first mix it together.  Taste and adjust for seasonings as desired.  Enjoy!

Please let me know if you try this recipe and if you like it!

Kelly
Click here for printable version of this recipe.

Saturday, December 4, 2010

Tuesday, October 26, 2010

Microwave Caramel Corn

This is a fabulous treat and so easy to make. Be careful because the caramel corn is extremely hot when it comes out of the microwave.  You'll be tempted to taste it right away, but DON'T...wait till it has cooled.  It's worth the wait.
The original recipe calls for 12 cups of popcorn and the caramel ingredients are doubled.  If you're doing this in a large paper grocery sack, go ahead and double the recipe.  If you're going to do it in a microwavable bowl with a lid, such as the Tupperware microwave cookery stuff, then use just 6 cups of corn and the recipe as it appears here.
Microwave Caramel Corn

Put in 1 qt. measuring cup, or in a large microwavable bowl with a microwavable lid (this is what I do):
½ c. brown sugar
¼ c. butter
2 Tablespoons white corn syrup
¼ teaspoon salt
¼ teaspoon baking soda

(All microwaves are slightly different and you may need to adjust your times appropriately) Microwave on HIGH and boil for 2-4 minutes.  ( I do 1 minute, stir, 1 minute stir, 30 seconds remove) Pop 6 cups of corn.  Spray non-stick cooking spray, such as PAM, in a large paper grocery sack.  (I just use my Tupperware microwave bowl with lid that I cook the caramel in.) Put popped corn in bag (in bowl) and pour (stir) caramel mixture over it.  Put in microwave on HIGH for 1 minute; shake; microwave 45 seconds; shake; microwave 30 seconds; shake; microwave 30 seconds; shake.  Pour caramel corn onto a cookie sheet to cool.  (I use a silicone liner in my cookie sheet, so there is no sticking)  Stir while cooling so the pieces separate.

 I'm going to a craft fair tonight to sell my handmade cards and scrapbook and paper craft items.  These treat bag toppers are so adorable and fun to make. I'll be selling a topper kit.  You'll be able to add your own treats to the cellophane bags, assemble your treat toppers as shown here and give away treats to delighted friends! More info on the treat bags here.

Tuesday, August 24, 2010

Garden Fresh Hash Browns with Herbs, Ham, and Eggs

My husband and I take such delight in gathering our meals in the garden.  This breakfast turned out to be so delicious I couldn't wait to write it down and share it.  The sweetness of the ham and tomatoes combined with the freshness of the herbs and the tang of Gruyere and fresh garlic create a taste bud explosion! If you garden, and I hope you do, then you're going to love this skillet breakfast.  If you don't garden, get these ingredients at a local farmers market.  Enjoy!

Country Garden Hash Browns

This is a great way to incorporate a nice variety of your garden produce and fresh herbs into a scrumptious country breakfast. This recipe serves 2 abundantly, 3 nicely, and 4 rather meagerly; so it should depend on your appetite whether you invite your friends or not. 

Ingredients:
3 medium sized red potatoes, about 1 lb, scrubbed and diced
Olive oil
1 onion, diced
1 sweet banana pepper, diced
2 cloves garlic minced
Fresh Herbs: Chives & Parsley are what I used
¾ cup diced ham (approximately)
2 Tbsp. shredded Gruyere cheese (parmesan or Swiss will also work well)
Salt
Pepper
Fried eggs (one for each person) or scrambled depending on your preference
1 large tomato diced

Turn stove top heat to medium high. Add olive oil to a 10” iron skillet (or some other type of heavy skillet) to cover the bottom with about 1/16th of an inch deep with oil. Heat oil until it is barely smoking. Carefully add diced potatoes spreading out flat in pan, sprinkle with a couple of pinches of salt and pepper. Cover the pan with foil and allow the potatoes to cook undisturbed for about 5-8 minutes. Start checking after 5 minutes. Do not stir or turn until the edges of the potatoes are starting to brown. Turn browned potatoes and remove foil. Continue to fry for at least 2 more minutes before adding onion and pepper. Stir to combine. Allow onion to become soft and slightly caramelized. Add ham and minced garlic and stir. Add 2-3 tablespoons of chopped fresh chives and parsley (combined) and stir. When ham is heated through, remove hash browns from the pan to a warm serving plate and sprinkle with cheese. Top with hot fried or scrambled eggs and sprinkle with diced tomatoes.

©Kelly Rose, 2010

Friday, August 20, 2010

Refried Bean Recipe

Last year, the first year of our gardening adventure, we planted pinto beans.  The conversation before planting went something like this...

Me:  I wonder if we planted pinto beans if we would get a pinto bean plant that would grow more pinto beans?
Shawn:  I don't know.
Me:  Do you think we should try it?
Shawn: O.K. Do you have any pinto beans?
Me:  Yep, in the cupboard.
Shawn: Go get 'em.

And that's how we got started.  Our yield was about 3 cups of dried pinto beans. This year, we used the pinto beans that we grew last year as well as some more from the store, so we could compare and planted at least 10 times as much.  Our yield this year is about 70 lbs of dried beans.
We let the bean pods dry out on the plant and then when most of the pods were dry we cut all the plants off at the ground and left they lying (or is it laying?) on the ground to continue drying in the sun.  When we had a threat of rain, we took them into the Quonset hut and layed (or should it be laid...never really learned that one in school) them out on the floor to continue drying.  Once they were completely dry and the pods very brittle, we removed them from the pods by hand.  2 people worked on that project for about 8 hours.  A ridiculous amount of time.  If we continue to grow the beans, we must come up with a better way to get the beans out of the pods.  By the way, I was not one of those 2 people.  But the beans are delicious and it's really fun to eat things that you grew yourself.  Here's my recipe for refried beans...

Refried Beans

1 lb pinto beans
Water
Salt
2 Tbs bacon grease
1 jalapeño pepper, seeded and diced
2 onions, 1 inch dice
Heaping tablespoon of lard or Crisco

Rinse thoroughly and pick through the beans. Remove any that are flat, remove any rocks or debris. Put the beans in a pot and cover with at least 2 inches of water. Heat the beans and water to boiling. Boil for 10 minutes over medium heat. Turn off the heat and let the beans soak for 1 hour in the hot water. After 1 hour, drain and rinse the beans a second time. Return the rinsed beans to the pot, cover with 2 inches of water add 3 large pinches of salt, bacon grease, onions and jalapeño. Cover and bring to a boil. Turn down heat and simmer for 2-3 hours. Add more water if needed. After about 2 hours, start checking the beans for tenderness every half hour. They should be extremely soft before refrying. To refry, add lard to a frying pan, and turn heat to medium. When the fat is sizzling hot, add beans with a slotted spoon and mash with a potato masher. If the beans start to dry out too much add more cooking liquid. Add salt to taste and serve immediately. Leftovers will keep in the refrigerator for several days.


Hope you enjoy, and I'd love hearing from you...
Kelly

Wednesday, August 4, 2010

Cucumbers?! Make garden fresh Tzatziki sauce!

Our cucumber plant it going crazy right now and we don’t have any more lettuce! Ah! Yesterday, I thankfully remembered how much I love Tzatziki sauce! It’s a great way to use your cucumbers AND herbs!


Garden Fresh Tzatziki Sauce

1 medium cucumber, grated

16 oz container of plain Greek yogurt

1 tablespoon of olive oil

2 teaspoons lemon juice

½ teaspoon salt

1 teaspoon dried dill or 1 tablespoon fresh dill leaves chopped (oregano is also good to use)

6 fresh mint leaves chopped

2 garlic cloves, finely minced
Grate the cucumber then wrap it up in a clean towel, and squeeze to remove the excess liquid. Combine all ingredients in a bowl and stir. Cover and allow to rest in the refrigerator for 1 hour before serving.

Sorry about the bad photo, I'm having camera issues right now...

My favorite way to eat Tzatziki sauce is with the Persian ground beef kabobs, buttery white rice and grilled fresh tomatoes. I make my own “kabobs” by adding egg, bread crumbs, fresh minced garlic, grated onion, salt, pepper, oregano and a tiny bit of tumeric. I’ve never written the amounts for a recipe for this, but it’s approximately one pound of lean ground beef, 1 egg, ¼ cup breadcrumbs, 2 garlic cloves, 1 small onion grated, ½ tsp salt and ¼ tsp pepper, ½ tsp oregano. Sometimes I will wrap this around skewers and grill, but most the time I just make patties out of the mixture and fry them in an iron skillet. My husband LOVES garlic and onions so he’s especially fond of these little patties. He tolerates the Tzatziki sauce because it has our homegrown cucumbers in it.

I also love to dip warm pita bread in the sauce…try making your own some time or just use a frozen pizza or bread dough to make some flat bread. So delicious!
If you try it, let me know what you think!
Happy harvesting!
Kelly

Monday, July 12, 2010

Community Chickens

I'm so curious to know if anyone out there has ever been involved with community chickens?  You know, like a community garden?  We have space, but no money to invest...and a huge desire to be raising our own chickens to eat and our own organic eggs to use.  I would love to hear from you if you've ever tried it or know someone who has.  I have no idea how it should be organized....any suggestions?

Sunday, July 4, 2010

Snow Pea Stir Fry Recipe

Snow Pea Stir Fry (side dish)
Add chicken and rice for complete meal
We have TONS of snow peas right now, so we eat them raw with Ranch Dressing, and sauted with garlic and basil, and in our salads, but our favorite way is this snow pea stir fry. Yummy!

Ingredients:1 lb snow peas
2 Tbsp. Extra Virgin Olive oil
½ tsp. sesame oil (optional)
1 Tbsp brown sugar
2 Tbsp sherry
1 Tbsp soy sauce
1 tsp corn starch
2 Tbsp water
1 Tbsp fresh minced garlic
1 Tbsp fresh grated ginger root (Tip:  Grate what you need and freeze the rest, it will keep for a long time in the freezer and is much easier to grate when frozen.  And a microplane grater/zester is a MUST HAVE!  Use for grating fresh nutmeg and zesting lemons and limes)

Combine the cornstarch and water, mix well. Combine brown sugar, sherry, and soy sauce, set aside.

Add Oil to frying pan or wok, large enough to contain all the peas and allow room for stirring on Medium High heat.
When oil is sizzling hot and just starting to smoke, add the peas and toss in hot oil for 1-2 minutes depending on your desire of doneness.

Add ginger and garlic to hot pan and stir until softened and aromatic. Add the brown sugar mixture and water and cornstarch. Stir quickly to combine. When the sauce has thickened and begins to coat the peas, remove and serve hot. © Kelly Rose, 2010


I like to marinate chicken thighs in Kraft Asian Toasted Sesame Salad Dressing and Marinade for 1 hour. I then lay them in a Pam sprayed glass baking dish and sprinkle with Steak seasoning. Bake in a 400 oven for about 45-55 minutes. Prepare the peas after you remove the chicken from the oven and serve together with a salad or rice for a complete dinner. Your family will really thank you for this one!

Here's to the Snow Pea!!
Kelly

Friday, July 2, 2010

First Loaf Recipe - Bread Recipe

Here's the recipe for the first loaf of successful bread with photos.  The day after I made these loaves, I tried a buttermilk whole wheat recipe that also turned out terrifically...soft, not crumbly, good taste...a keeper recipe!  I'll share that recipe later.  I hope the photos help!

Ingredients:
5 to 6 cups bread or all-purpose flour, approximately
3 Tbsp. sugar
2 tsp. salt
1 package dry yeast
1/4 cup nonfat dry milk
2 cups hot water (120 - 130 degrees F)(you really should use a thermometer)
3 Tbsp. shortening, room temperature
This recipe is for 2 loaves of bread baked in medium bread pan (8 x 4 inches).  The directions are for using a Kitchen Aid to mix and knead.

In your mixer bowl combine 2 cups flour, sugar, salt, yeast, and dry milk. 
Pour the hot water into these dry ingredients and beat with the paddle attachment to blend thoroughly.


Add the shortening and continue beating until well combined.

Add 1 cup flour and beat for 3 minutes at medium speed.


It helps to actually set your timer for these blending times. Smile.
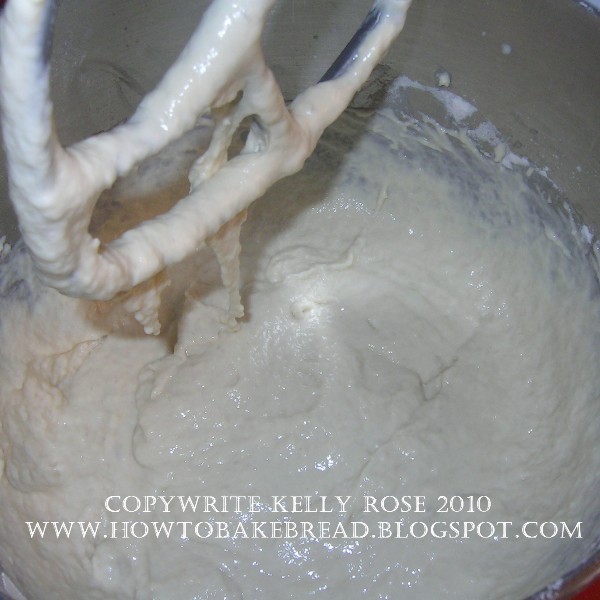
The photo above is after the 3 minutes.  See the "stringy" effect?  The gluten strands are beginning to form.

Add the flour, 1/4 cup at a time until the dough forms a soft, elastic ball around the dough hook attachment. I have included all the progressive photos of this bread making step so you can see the dough as the flour is added.


After it gets to the stage where the dough has cleaned the sides of the bowl thoroughly and is not sticky to the touch, you can begin kneading.  Set your timer for 10 minutes.  I have to stand next to my mixer because my mixer starts to dance across the counter.

The photo directly above shows the kneaded dough.  You should be able to stretch the dough for quite a ways and it will become almost paper thin before breaking.  If your dough was soft enough, this is what it should look like. Bernard Clayton says that to test your dough to see if you've kneaded enough, put the dough on a flat surface, slap your hand onto the dough and count to 10.  You should be able to remove your hand without any dough sticking to it.
Now place the dough in a lightly greased bowl, cover tightly with plastic wrap and leave at room temperature until the dough has doubled in bulk.


Now punch down the dough to remove large air bubbles.  Remove dough to a cutting surface and cut into 2 equal balls.  Let these rest for 3 minutes.

Form the loaves by flattening the balls into ovals slightly longer than the pans.

Fold the sides under and pinch together.  You'll see on my bread what happens if you don't pinch thoroughly enough. Tuck the ends of the dough under and pinch.

Place the shaped loaves into greased pans and cover with waxed paper for the 2nd rise.  Preheat the oven to 400 degrees F about 20 minutes before baking.  The second rise will take about 45 minutes to an hour.

Here's what it should look like!

Bake at 400 degrees F for 10 minutes, then lower the oven heat to 350 and continue baking for an additional 25-30 minutes.  Halfway through the baking, turn the pans 180 degrees inside the oven so they bake uniformly.

Cool on a wire rack. Aren't they beautiful!

And there's my hole from not pinching carefully enough.
This is excellent bread...not too big on taste, but is soft and hold together really well.
I'm excited to share the whole wheat recipe with you as it tastes much better and comes out looking just as beautiful.  Till then!  Thanks for stopping by!  Kelly
Thank you Mr. Clayton!

Monday, June 28, 2010

My Favorite Homemade Pancake Recipe

Growing up, the only pancake I think I ever ate was a Bisquick pancake and ...I really don't care for them.  The older I got, the more I realized there were good pancakes out there to be eaten, so of course on my quest to be able to make anything and everything from scratch, here's the recipe I've developed for a light, fluffy, delicious homemade pancake.

These are some SWEET kitchen essentials.  A silicone spatula and an enameled Cast-Iron skillet.  I love being able to use my spatula in hot foods without it melting, and as for enameled cast-iron...well, it's pricey, but awesome.  You get that great heat conduction of the iron skillet without having to worry about the constant seasoning and rusting of traditional cast iron.   And Julia (Childs, that is) recommends enameled cast iron, so that's enough reason for me to use it!

Kelly's Buttermilk Pancakes (small batch)

Ingredients:
3/4 cup all purpose flour
1 Tbsp sugar
1/4 tsp salt
1 tsp baking powder
1/2 tsp baking soda
2 Tbsp melted butter
2 eggs divided
3/4 cup buttermilk (you can substitute yogurt for the buttermilk!)

Combine all dry ingredients in a bowl and mix with a wire whisk. Add the egg yolks, buttermilk and melted butter to the dry ingredients and whisk until well blended.  Beat the egg whites until stiff and fold into batter.  To fold do a bottom to top circular motion "lifting" the bottom of the bowl ingredients onto the top and "folding" over with a spatula.  If you choose not to beat the egg whites, your pancakes will not be as light and fluffy.  The buttermilk gives a great flavor to the pancakes.  Heat a heavy skillet (I use a large iron skillet) over medium low heat with a tablespoon of corn oil.  When the oil is not (not smoking), add the batter in 1/4 cup amounts.  Batter may need some shifting to create a circular pancake, but move quickly!  When the pancake has even bubbles on top, turn and cook the other side.  If you keep you heat low enough, your pancakes should not burn, but they do take longer to cook.
Note:  This recipe feeds 4 quite nicely. You can double this recipe for a larger crowd by doubling all ingredients except the eggs.  You only need 3 eggs when doubling.
My favorite pancake syrup is Log Cabin when I'm too cheap to buy real maple syrup.

Sunday, June 27, 2010

Snow Pea Bounty

Look at these gorgeous things!  Aren't they beautiful!  And just as delicious as you would imagine.  I made a stir fry with them today that was divine.  The sauce turned out a little thick, though, so I'm going to try it one more time with some adjustments before I post the recipe.  But I can tell you that I used brown sugar, soy sauce, fresh garlic, sherry, fresh ginger and cornstarch.  The taste was magnificent.  I'll also be posting a terrific and quick recipe for marinated chicken thighs. The combination makes an impressive meal.
edited 7/4/2010 Here's the recipe I promised!  Snow Pea Stir Fry.

I killed the yeast!

Yesterday I tried another recipe from Bernard Clayton's book that required warmed milk, but I think I got the milk too warm.  I didn't check the temperature, went ahead and added it to the yeast mixture and I got NO RISE!!!  I was SO mad at myself for wasting all that flour and yeast.  AAAHHH!!!  A hard lesson learned!!
Don't kill your yeast with too much heat!  And it was kneaded so beautifully, too!  I will try that recipe again, and we're out of bread, but I was too depressed to try again and today my car needs to be cleaned.  And truthfully, I'm still recovering from the trauma.  I should have taken a picture to show you.